

4. Extension configuration in Umbraco
In this last step, we configure the extension in Umbraco to use the service account for Google Analytics, Google Search Console and PageSpeed Insights reports.
The Google Analytics by Flowcourier UI is split over three areas of the Umbraco backoffice:
- Settings → Flowcourier — connection settings (Umbraco administrators only)
- Analytics — site-wide statistics: a Google Analytics overview and a Google Search Console overview, optimized for CMS users
- Content → Visitors — per-page statistics, performance and SEO data
Create a Data Connection in Umbraco Settings
Section titled “Create a Data Connection in Umbraco Settings”1. Go to the Umbraco Settings area
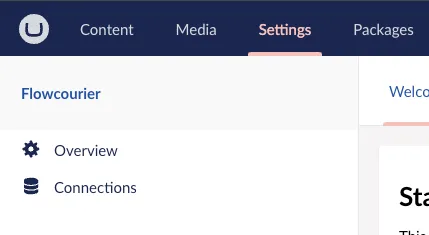
Section titled “1. Go to the Umbraco Settings area”To create a new connection to Google Analytics, go to Settings → Flowcourier in the Umbraco backoffice as an Umbraco administrator.
2. Add the Google Services Connector
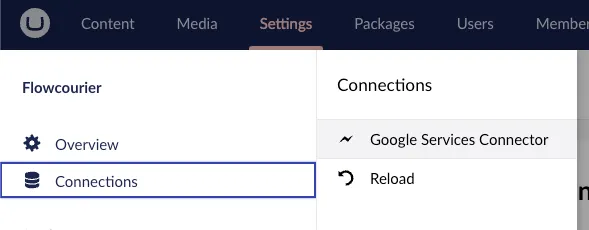
Section titled “2. Add the Google Services Connector”On the Connections item, add a new connection by clicking the Google Services Connector link.
3. Fill in the required fields
Section titled “3. Fill in the required fields”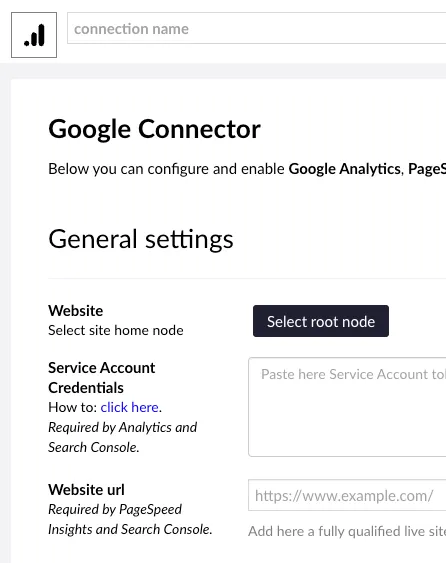
- Connection Name: A name for the connection, for example “Google Analytics”.
- Website: Select the home node of your Umbraco site. Page paths are resolved relative to this node when mapping analytics data to your content.
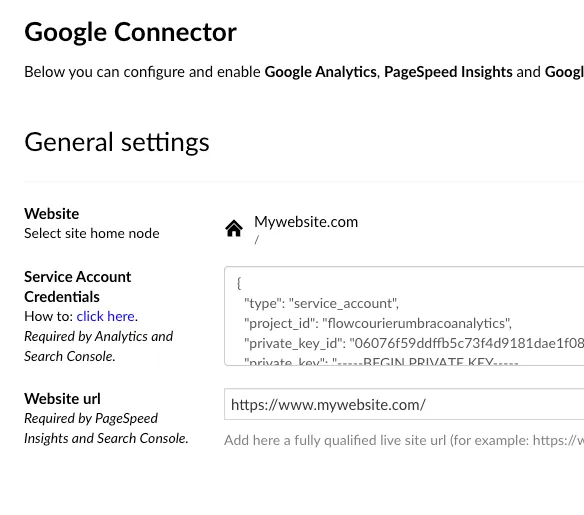
- Service Account Credentials: The JSON key of the service account. Steps 3.1–3.4 below show how to create and download it.
- Website URL: The canonical URL under which Google sees your website. Google Search Console and PageSpeed Insights use it to build the full URL of each page.
3.1 Go to Google Cloud Console IAM & Admin
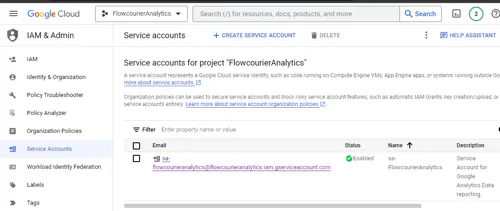
Section titled “3.1 Go to Google Cloud Console IAM & Admin”Go to the Google Cloud Console and in IAM & Admin, open Service Accounts. Then click your service account.
3.2 Create a key
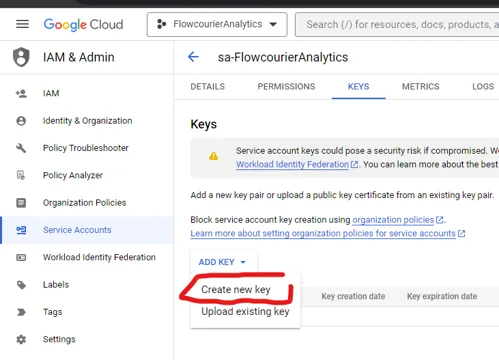
Section titled “3.2 Create a key”Click the KEYS tab and then click ADD KEY → Create new key.
3.3 Download the JSON key
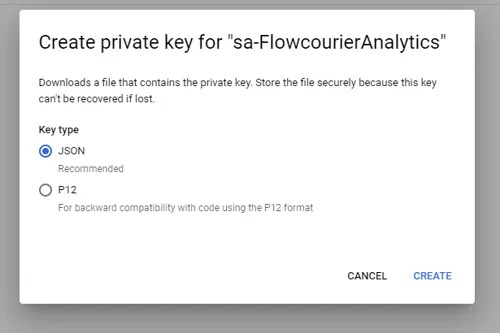
Section titled “3.3 Download the JSON key”Choose the JSON key type.
3.4 Paste the JSON key into the Umbraco backoffice
Section titled “3.4 Paste the JSON key into the Umbraco backoffice”Open the downloaded JSON key file in a text editor and copy its entire content into the Service Account Credentials field in the Umbraco backoffice. It should look like this:
{ "type": "service_account", "project_id": "flowcourieranalytics", "private_key_id": "xxxxxxxxxxxxxxxxxxxxxxxxxxxxxxxxxxxxxxxx", "private_key": "xxxxxxxxxxxxxxxxxxxxxxxxxxxxxxxxxxxxxxxx"}The finished configuration should look like the screenshot below:
4. Enable the Google services
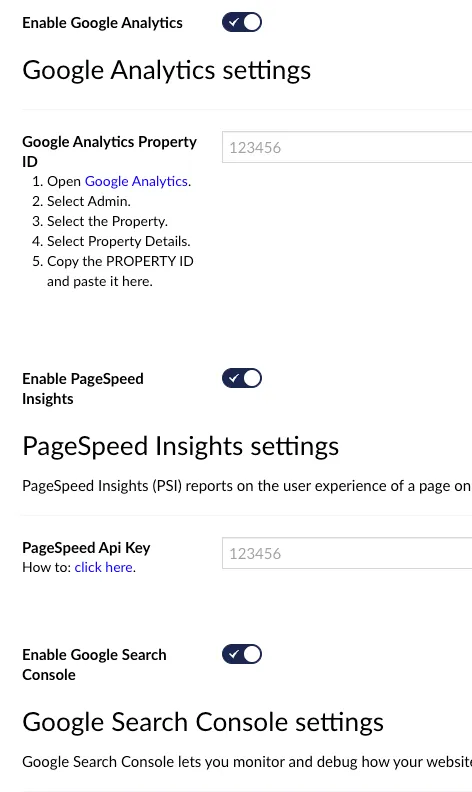
Section titled “4. Enable the Google services”Enable the Google Analytics, Google Search Console and Google PageSpeed Insights services by following the instructions on the screen.
Give Users Access to the Analytics Section
Section titled “Give Users Access to the Analytics Section”All users already have access to the Content section (and its Visitors views), but the Analytics section is only visible to users who have been granted access to it. To grant access, go to Groups under the Users area of the Umbraco backoffice.
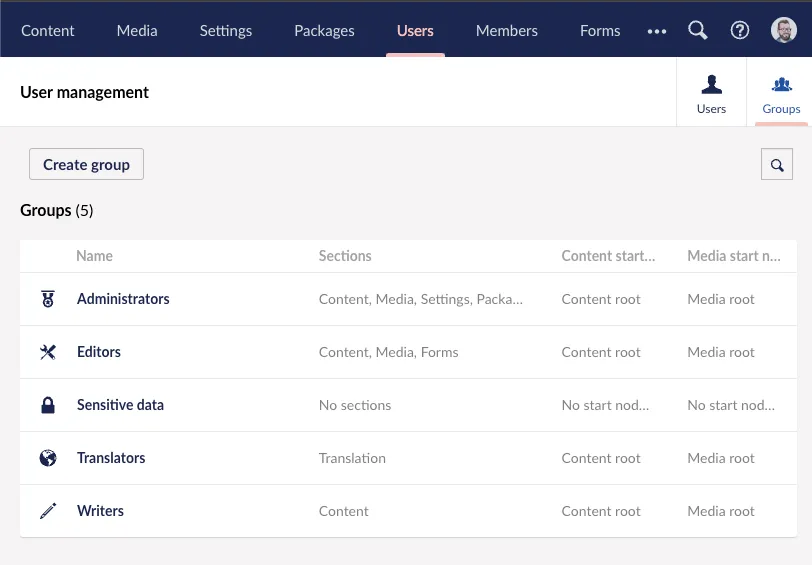
Add the Analytics section to a user group
Section titled “Add the Analytics section to a user group”Create a new user group, or edit an existing one, and add the Analytics section to it.
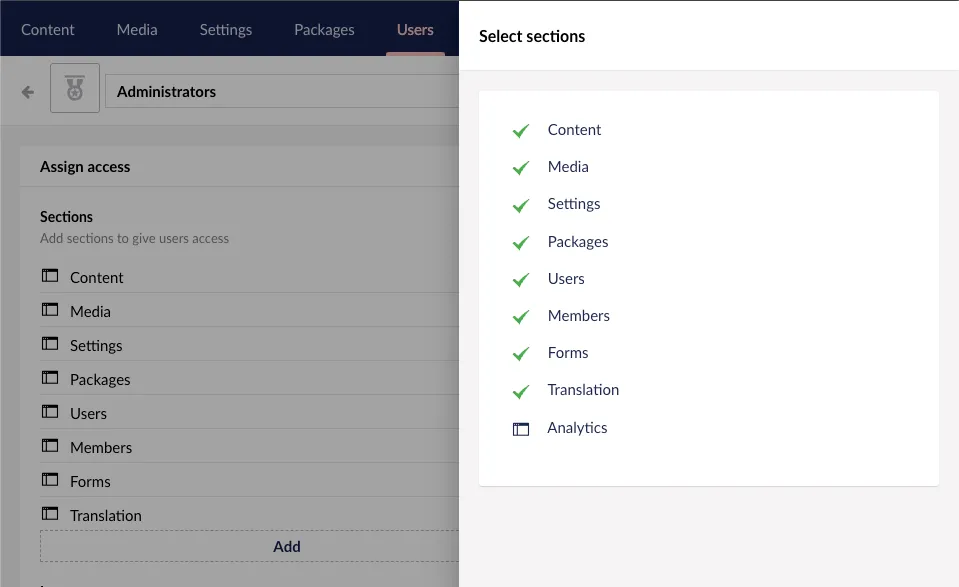
Reload the Umbraco backoffice, and the Analytics section appears in the top menu for the members of that group.
Install the License
Section titled “Install the License”Once you have purchased a license, install it by dropping the license file into your site’s umbraco/Licenses folder. Flowcourier automatically scans this directory for valid licenses.
CONGRATULATIONS! You have now successfully configured the Google Analytics by Flowcourier extension in Umbraco.